When I first started teaching yoga, I thought "easy flow" just meant slowing down the pace. I was wrong. It actually means building a sequence that a total beginner can do safely without a mirror, without a teacher physically adjusting them, and without the fear of "doing it wrong" lurking in the back of their mind. Most beginner videos give you a list of poses to follow. This guide is different. It pairs a simple 15-minute sequence with breath cues, alignment principles, and three modification levels so you understand exactly why you are moving and how to adapt it to your body.
The truth is less about the poses and more about your internal awareness. When you understand the purpose behind each position, the practice becomes a conversation between your body and your breath, not just a series of shapes to copy.
Why Most Beginners Quit Yoga (And How This Flow Fixes It)
A few years ago, a student named Mark came to me after three months of doing online yoga videos. He was flexible, and he could touch his toes easily, but he complained of a nagging pain in his lower back. When I watched him move, I immediately saw the problem. Every time he folded forward, he rounded his spine like a turtle shell. He was using his ligaments and connective tissue to hold the weight, while his abdominal muscles were completely inactive.
He did not need more stretching. He needed better alignment and a clearer understanding of how to engage his core. This is the missing link that most "easy yoga" videos ignore.
Most people do not realize that a passive stretch in a yoga pose can actually do more harm than good if your joints are not supported by the surrounding muscles. This is why the "just follow along" approach fails so often. It does not teach you how to feel for the foundational strength that protects your lower back, knees, and shoulders.
This flow fixes that by explicitly teaching breath synchronization and core engagement from the very first movement.
The 'How' and 'Why' Framework: Breath, Alignment, and Awareness
Before we move onto the mat, you need to understand the three pillars that make this sequence effective.
Breath Synchronization (Ujjayi Breath Basics)
In yoga, the breath is the metronome. Each movement is tied to either an inhale or an exhale. The rule of thumb is simple: inhale to lengthen, exhale to fold or twist. When you inhale, the diaphragm descends. This creates intra-abdominal pressure, which stabilizes the spine and gives you a strong foundation for backbends or standing poses. When you exhale, the parasympathetic nervous system activates, allowing muscles to relax and release.
I recommend breathing through the nose only during this flow. If your nose is congested or you feel dizzy, breathe through your mouth gently, but try to keep the rhythm even.
Neutral Spine and Core Engagement
Yoga is not about bending your body into pretzels. It is about finding length and space. In every standing pose, your goal is to maintain a neutral spine. That means the natural curve of your lower back is intact, not over-arched and not tucked under. The core is active, which draws the lower ribs in and lifts the pelvic floor.
A common misconception is that tucking your tailbone under protects your lower back. In reality, this flattens the lumbar curve and can lead to compression. Instead, think about drawing your navel in and up, as if you are zipping up a tight pair of jeans. This lengthens the spine naturally.
The 15-Minute Easy Yoga Flow for Beginners
Find a quiet space where you will not be interrupted. You will need a yoga mat and a wall. That is it. The entire sequence is broken down into three phases below. Move slowly, follow the breath cues, and use the modification level that fits your body on that given day.
Pro Tip: Set a timer on your phone. Spend exactly 15 minutes here. The timer frees your mind from wondering "how long do I hold this?".
Phase 1: Centering and Grounding (2 minutes)
Pose: Child's Pose (Balasana) with Side Stretch
Begin seated on your heels with your knees wide and your big toes touching. Walk your hands forward until your forehead rests on the mat. As you inhale, slide your hands to the right, feeling a stretch along your left rib cage. Exhale, come back to center. Inhale to the left, exhale back to center.
Breath cue: Inhale to lengthen the spine. Exhale to sink the hips a little deeper toward your heels.
Alignment check: The most common mistake here is lifting the tailbone too high, which rounds the lower back. Keep your sitting bones heavy and pressed toward your heels.
- Level 1 (Tight Hips): Place a folded blanket under your thighs to elevate your hips and reduce pressure on your knees.
- Level 2 (Weak Core): Actively press your forearms into the mat and reach your fingertips forward to engage the lats.
- Level 3 (Limited Mobility): Use a bolster or a stack of pillows under your chest so your forehead rests on the prop instead of the floor.
Phase 2: Spinal Warming and Connecting to the Breath (3 minutes)
Pose: Cat-Cow (Marjaryasana-Bitilasana)
Come to a tabletop position. Stack your wrists directly under your shoulders and your knees directly under your hips. Take a full inhale, then as you exhale, round your spine like a Halloween cat, tucking your chin to your chest. On the next inhale, lift your chest and sit bones toward the ceiling, letting your belly drop.
Breath cue: Exhale to round. Inhale to arch.
Alignment check: Move slowly. The intention is spinal fluidity, not depth. If you feel any pinching in your lower back, decrease the range of motion.
- Level 1 (Tight Hips): Shift your weight slightly forward from your hands to your knees to create more space in the front of the hips during the arch.
- Level 2 (Weak Core): Imagine you are holding a beach ball between your navel and your spine. Keep the deep core engaged so you do not just drop your lower back into a deep sway.
- Level 3 (Limited Mobility): If your wrists hurt, make fists and rest your weight on your knuckles instead.
Transition: From the last tabletop position, tuck your toes and lift your knees off the mat to send your hips up and back into Downward Facing Dog.
Phase 3: Foundation and Standing Strength (10 minutes)
Pose: Downward Facing Dog (Adho Mukha Svanasana)
This is your reset pose. Spread your fingers wide and press firmly into the mat, especially the base of your index finger and thumb. Pedal your feet one at a time, bending one knee and driving the opposite heel toward the floor.
Breath cue: Inhale to lift your hips high. Exhale to press the thighs back and lengthen the spine.
Alignment check: Most beginners carry tension in their shoulders here. Actively press the floor away from you and draw your shoulder blades up toward your hips. This creates space in the neck.
- Level 1 (Tight Hamstrings): Keep your knees strongly bent. It looks less "insta-worthy", but it protects your lower back and allows your spine to lengthen.
- Level 2 (Weak Core): Draw your navel in and tuck your tailbone slightly. This shifts the work into your abdominals rather than your lower back.
- Level 3 (Limited Mobility): If your wrists ache under pressure, practice the pose with your hands on a higher surface like a bench, kitchen counter, or the seat of a heavy chair.
Transition: Walk your hands back to your feet and come up to standing for Mountain Pose.
Pose: Mountain Pose (Tadasana)
Stand with your feet hip-width apart. Lift all ten toes, spread them, then press them back down. Roll your shoulders up, back, and down. Engage your quads so the knee caps lift, and draw your navel in.
Breath cue: Inhale to reach your arms overhead. Exhale to release your hands to your heart center.
The thing nobody tells you about Mountain Pose is that it is the hardest ordinary pose in yoga. It requires you to stand with active muscles instead of passive bones.
- Level 1 (Tight Hips): Keep your feet slightly wider than hip-width apart. This takes stress off the hip flexors when standing tall.
- Level 2 (Weak Core): Squeeze your glutes gently and imagine you are holding a pencil between your sitting bones.
- Level 3 (Limited Mobility): Stand with your back against a wall for added support and sensory feedback.
Pose: Forward Fold (Uttanasana) to Halfway Lift (Ardha Uttanasana)
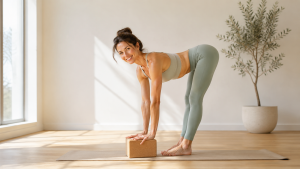
From Mountain Pose, inhale to reach your arms up, then exhale to hinge forward at your hips. Let your head hang heavy. At the bottom of your exhale, place your hands on your shins or the floor. On your next inhale, lift your chest halfway up with a flat back. Exhale to fold again.
Breath cue: Exhale to fold. Inhale to lengthen the front of your torso.
Alignment check: This is where Mark's issue lived. Do not round your back. Hinge at the hip sockets so your sit bones point up toward the ceiling. If your hamstrings are tight, bend your knees generously.
- Level 1 (Tight Hamstrings): Bend your knees deeply and place your hands on yoga blocks or a stack of books. You want to feel the stretch in your back, not a painful pull behind your knees.
- Level 2 (Weak Core): In your forward fold, actively press your front thighs back to engage the quads and core.
- Level 3 (Limited Mobility): Perform the "rag doll" variation. Cross your arms and let your torso sway gently, never forcing your legs straight.
Pose: Chair Pose (Utkatasana)
From your forward fold, bend your knees deeply as you send your hips back and lift your chest. Reach your arms overhead, keeping your shoulders relaxed. Imagine you are sitting back into a chair. Keep the weight in your heels.
Breath cue: Inhale to lift the chest. Exhale to sink the hips lower.
This pose builds major strength in the quads. I see people rise onto their toes here, which is a cheating method that destabilizes the knees. Keep your heels glued to the mat.
- Level 1 (Tight Ankles/Hips): Widen your stance to hip-distance or slightly wider. This reduces the required ankle mobility.
- Level 2 (Weak Core): Keep your arms overhead only if your core can hold your spine tall. If your ribs are flaring out, clasp your hands at your chest until your core fires up.
- Level 3 (Limited Mobility): Hold on to a chair back or a wall facing you. Sit only as deep as feels stable.
Pose: Warrior II (Virabhadrasana II)
Step your left foot back about three to four feet, turning the back toes out slightly. Bend your right knee so it stacks directly over your right ankle. Keep your knee tracking toward your second toe. Reach your arms strongly out to the sides, parallel to the floor.
Breath cue: Inhale to root down through your feet. Exhale to deepen the bend in the front knee.
Alignment check: The most common mistake is a swaying back. The back hip and front hip must stay level. Do not let the torso lean forward.
- Level 1 (Tight Hip Flexors): Widen your stance so your front knee can stay stacked without pulling your pelvis off-center.
- Level 2 (Weak Core): Actively press the outer edge of your back foot into the ground. This waking up of the back leg stabilizes the pelvis, which lessens the load on your lower back.
- Level 3 (Limited Mobility): Shorten your stance. If you are not a spring chicken, losing balance is a real risk. Keep your back foot against a wall or keep your hands on your hips.
Hold Warrior II on the right side for one full minute. Then, inhale, straighten your right leg, and step forward to your hands. Wait, let us take it right side first. Repeat on the left side for one minute.
Pose: Triangle Pose (Trikonasana)
From the left Warrior II, straighten your left front leg and reach your left arm forward. Hinge at the hip to bring your left hand down to your shin, a block, or the floor. Reach your right arm straight up toward the ceiling. Open your chest by rolling the right ribs forward.
Breath cue: Exhale to hinge and reach. Inhale to lift the top arm and lengthen the spine.
Most beginners collapse onto their bottom hand, compounding compression on the lower side of the ribcage. Instead, actively push the ground away and wrap your shoulder blades toward your spine.
- Level 1 (Tight Hamstrings): Bend the front knee slightly to allow the spine to stay long. The focus is on opening the chest, not on straightening the leg.
- Level 2 (Weak Core): Keep the core hugged in to prevent over-stretching the lower ribs and arching the lower back.
- Level 3 (Limited Mobility): Skip Triangle entirely. Instead, rest your hand on the seat of a chair and simply lift the opposite arm. This preserves the chest and shoulder opening without the balance demand.
Pose: Sphinx Pose (Salamba Bhujangasana)
Come down to the floor and lie on your belly. Place your forearms on the mat, elbows directly under your shoulders. Press your forearms down firmly and lift your chest off the floor. Keep your neck long, and let your shoulder blades descend down your back.
Breath cue: Inhale to lift the chest. Exhale to ground the legs and hips into the floor.
This is a gentle backbend. If you feel any pinch in the lower back, slide your forearms farther forward and lift a little less high. It is better to move with control than to fling yourself into a deep backbend.
- Level 1 (Tight Shoulders): Place your hands on a block in front of you to reduce the range of motion in the shoulders.
- Level 2 (Weak Core): Squeeze your glutes slightly and press your pubic bone into the mat. This protects the lumbar spine.
- Level 3 (Limited Mobility): If lying on your stomach is uncomfortable, do a standing chest opener against a wall instead.
Pose: Happy Baby (Ananda Balasana)
Roll onto your back. Draw your knees into your chest, then grab the outer edges of your feet with your hands. Open your knees wider than your torso and stack them over your hips. Rock gently side to side.
Breath cue: Exhale to press your thighs down toward the floor. Inhale to relax and soften.
This is the counter-pose to Sphinx. It releases the lower back and hips. If you cannot reach your feet, hold your ankles or the backs of your thighs instead.
- Level 1 (Tight Hips): Place one hand on each thigh or knee and simply press the knees down without holding the feet.
- Level 2 (Weak Core): Actively press your tailbone down and your lower back into the floor.
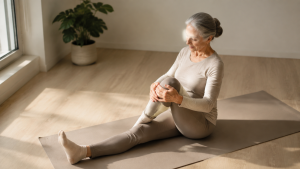
- Level 3 (Limited Mobility): Do Knee-to-Chest pose. Simply hug one knee at a time into your chest.
Pose: Savasana (Corpse Pose)
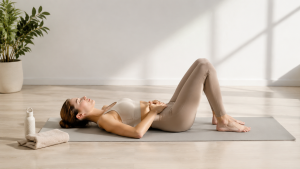
Release Happy Baby and stretch your legs out long. Let your feet fall open. Place your arms alongside your body, palms facing up. Close your eyes. Stay here for at least three full minutes.
Breath cue: Natural breath, no force. Just watch the rise and fall of your belly.
Savasana is not easy. Holding a yoga pose for three minutes requires patience, which for many busy beginners is the absolute hardest part of the practice.
- Level 1 (Tight Hips): Place a rolled blanket under your knees. This supports the lower back and turns off the hip flexors.
- Level 2 (Weak Core): Place a small hand towel over your eyes to block out visual stimulation and speed up the nervous system reset.
- Level 3 (Limited Mobility): If you have respiratory issues, lie on your left side in a comfortable resting position instead of flat on your back.
The 3 Modification Levels (Progressive Overload for Yoga)
One beginner video fails where another succeeds because of personalization. We all walk into yoga with different histories. The framework below is how I program for private clients. You may find that you are Level 1 for your hamstrings and Level 2 for your core. That is completely normal.
| Level | Your Profile | Primary Focus |
|---|---|---|
| Level 1 | Tight hips and hamstrings, desk-bound posture | Propping up the hips and hands. Widen stances. Focus on hinging at the hips, not the spine. |
| Level 2 | Weak core, lower back fatigue in standing poses | Drawing the navel in, engaging pelvic floor, keeping the lower ribs stacked over the pelvis. |
| Level 3 | Limited mobility, joint pain, or general deconditioning | Using a chair or wall for stability. Reducing depth in squats and folds. Prioritizing range of motion over intensity. |
The goal is simple. You want to progress from Level 3 to Level 1, and from Level 1 to an unmodified version of the pose over about 4 to 6 weeks of consistent practice.
How to Progress Through the Levels
Start with the Level 3 modifications for the first week. Even if you think you are flexible, use the props. This forces you to learn the correct movement patterns without your body cheating. By week two, try the Level 1 modifications. If you feel sharp pain, not the dull ache of stretching, step back to Level 3.
Do not rush progression. Yoga is a marathon, not a sprint. The athlete who lasts a lifetime is the one who listens to their joints.
Common Alignment Mistakes and How to Fix Them
Here are the three most common mistakes I see in my virtual and in-person beginner classes.
Rounded Lower Back in Forward Folds
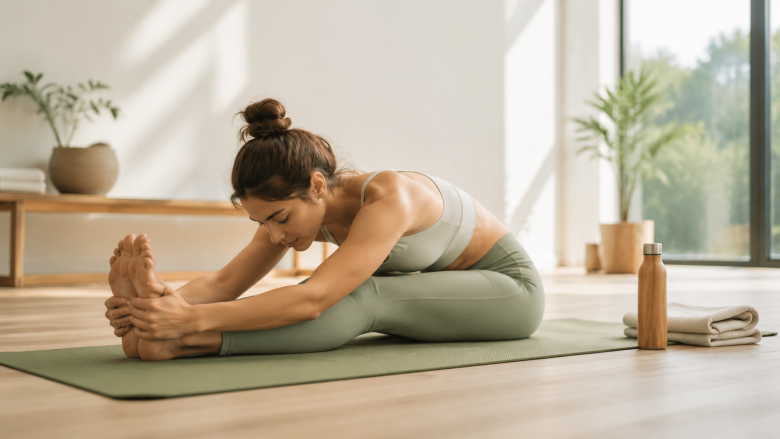
When you fold forward over straight legs, a tight hamstring will pull your pelvis and spine out of alignment. This causes the lumbar spine to flex, which over time can lead to disc issues. Most people think they need to stretch their hamstrings more. They actually need to engage their core and hip flexors to tilt the pelvis anteriorly.
Fix: Bend your knees generously, or sit on a folded blanket if doing a seated fold. Only straighten your legs when your chest can rest on your thighs without your back rounding.
Hyperextending Elbows in Seated Stretches
When the biceps are not engaged, some people naturally lock out their elbows. Over time, this takes the tension out of the intended muscle group (the back) and puts it into the joint capsule of the elbow.
Fix: In any seated forward fold or arm-reaching stretch, keep a micro-bend in the elbow. Actively press the floor away from you to engage the triceps.
Holding the Breath
Yoga poses generate an adrenaline response. In a fight-or-flight moment, your brain wants you to hold your breath. When you hold your breath, your muscles tighten, and your blood pressure spikes.
Fix: If you realize you are holding your breath in a pose, you are doing the pose too intensely. Step back to a Level 3 modification until you can breathe smoothly and evenly. Breath is your anchor.
If you want to deepen your practice at home and add these movements to a weekly plan, check out our guide on setting up a Beginner Weekly Yoga Flow at Home Each Morning to build momentum without burning out.
The Science of Why This Works
The focus on alignment and modifications is not just about comfort. It is about acting on how the musculoskeletal system works. A neutral spine with optimal Curvature supports efficient load transfer. When you engage the deep core muscles, like the transversus abdominis, it wraps around your torso like a corset and creates stiffness that protects the lower back.
Yoga is also a neurological exercise. When you learn to isolate and contract specific muscles based on anatomical cues, you are building body awareness. This body awareness transfers to everyday activities like picking up a box, sitting at a desk, or playing with your kids.
How to Build a Sustainable Habit (Progression Plan)
The biggest lie the fitness industry tells you is that you need to be motivated every single day. You already know this. Motivation is fleeting. You need a process.
Start with this 15-minute flow three times a week. Put it on your calendar right now. Treat it like any other appointment. In week two, double the time you spend in the standing balance poses. By week three, you can add a second round of the flow.
Weekly Schedule Template
- Week 1: 3 sessions x 15 minutes. Focus purely on breathing and Level 3 modifications.
- Week 2: 3 sessions x 15 minutes. Try Level 1 modifications and hold Chair pose for 30 seconds longer.
- Week 3: 4 sessions x 15 minutes. Add a 5-minute resting Savasana at the end.
- Week 4: 4 sessions x 20 minutes. Start following along with a video from our weekly morning flow guide to keep things fresh.
After 4 weeks, you will notice that getting into Downward Dog feels less like a struggle and more like a familiar stretch.
The Bottom Line on Easy Yoga Flow
The phrase "easy yoga flow" is a bit of a trap. It implies that there is a level of yoga where the poses do not require effort. That is not true. True ease comes from understanding your own body and adapting the practice to serve it. This flow is your starting point to understanding the practice.
Use the breath cues, revisit the modification levels, and pay close attention to the alignment notes. In a month, you will not recognize your forward fold. More importantly, your lower back, shoulders, and hips will quietly thank you. The goal is not to become a pretzel. It is to build a body you feel confident moving in every single day.